Loading...
This comparison has not been analyzed yet.
One-time AI generation (~1 minute). Scores and timeline are already available below.
Imagawa Yoshimoto vs Letsie I
Imagawa Yoshimoto leads by 5.0 pts · 2 figures compared
…
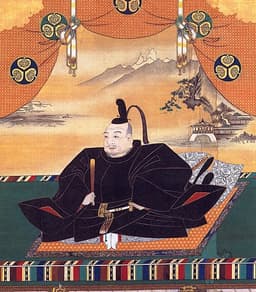
Imagawa Yoshimoto
Emperor · Modern
52.4Total

Letsie I
Emperor · Modern
47.4Total
Basic Information
Born
1519
1811
Died
1560
1891
Era
Modern
Modern
Nationality
Japan
Lesotho
Occupation
Emperor
Emperor
Civilization
Eastern
Other
Score Comparison
Military (10%)
55.0
50.0
Political (20%)
48.0
43.7
Influence (20%)
52.5
49.4
Legacy (20%)
43.3
39.2
Leadership (15%)
65.0
67.0
Strategy (15%)
60.0
36.8
TOTAL
52.4
47.4
Imagawa Yoshimoto — Complete Timeline
1536 AD
Became Daimyo of Suruga ProvincePolitical Action◆ Major
Imagawa Yoshimoto became daimyo of Suruga Province after a succession dispute. He consolidated control over the Imagawa clan and expanded their territory through alliances and military campaigns.
DaimyoSurugaImagawa
Impact: regional
1554 AD
Formed the Three-Way Alliance with Takeda and HojoPolitical Action◆ Major
Imagawa Yoshimoto formed a tripartite alliance with Takeda Shingen and Hojo Ujiyasu, securing his borders and allowing him to focus on expansion into central Japan. This alliance was a key diplomatic achievement.
AllianceTakedaHojo
Impact: regionalconstructive
1560 AD
Battle of OkehazamaWar
Imagawa Yoshimoto led a large army into Owari Province but was ambushed and killed by Oda Nobunaga's forces at the Battle of Okehazama. His death shattered the Imagawa clan's power and marked Nobunaga's rise.
BattleOda NobunagaDeath
Impact: nationaltragic
Letsie I — Complete Timeline
1870 AD
Succession as Paramount ChiefPolitical Action◆ Major
Letsie I succeeded his father Moshoeshoe I as paramount chief of the Basotho. His succession was contested by some rivals, but he maintained unity under British protection.
SuccessionBasothoParamount Chief
Impact: regional
1880 AD
Gun War with BritishWar◆ Major
Letsie I led the Basotho in the Gun War against the British Cape Colony, which attempted to disarm the Basotho. The Basotho successfully resisted, forcing the British to abandon the disarmament policy.
Gun WarBritish ColonialismBasotho
Impact: regionalconstructive
1884 AD
Administration of BasutolandPolitical Action
Letsie I worked with British colonial administrators to govern Basutoland after it became a Crown colony. He maintained traditional authority while adapting to colonial rule, preserving Basotho autonomy.
Colonial AdministrationBasutolandGovernance
Impact: regional
This comparison has not been analyzed yet.
One-time AI generation (~1 minute). Scores and timeline are already available below.
Rankings
🥇
Imagawa YoshimotoLeader
Mil: 55.0Pol: 48.0Inf: 52.5
52.4
🥈
Letsie I
Mil: 50.0Pol: 43.7Inf: 49.4
47.4
+5.0 behind
How This Comparison Works
Algorithm
Each figure is scored on 6 dimensions (0—100 scale) based on structured historical data: Military (10%), Political (20%), Influence (20%), Legacy (20%), Leadership (15%), Strategy (15%). The weighted total produces the final ranking.
Data Sources
Scores are computed from structured sub-indicators in the database. Scale factors adjust for era (Ancient ×0.85, Modern ×1.0) and civilization size (Eastern ×1.05, Other ×0.80) to account for differences in population and military scale.
Maximum 3 Figures
Comparisons are limited to 2—3 figures to ensure readability and statistical meaningfulness.
Error Margins
±5 points per dimension — Sub-scores are derived from historical records with inherent uncertainty. Two figures within 5 points on a dimension should be considered roughly equivalent in that area.
Total Score Accuracy
±3 points overall — The weighted combination of 6 dimensions produces a total score with approximately ±3 points of uncertainty. Differences of less than 3 points are not statistically significant— the figures are effectively tied.
Known Limitations
- Historical records are incomplete and uneven across civilizations
- Figures from oral-tradition societies may be underrepresented
- Occupation labels can misclassify multi-role figures
- Scores measure capability and impact, not moral character
- Quantitative scoring is a comparison tool, not absolute truth
Capability Radar
Military (10%) — Battles & Warfare
Battles
45
15
Win Rate
40
20
Expansion
60
10
Political (20%) — Governance & Reform
Reform
35
30
Diplomacy
45
35
Economy
40
25
Influence (20%) — Cultural & Global Reach
Cultural
35
25
Global
20
10
Legacy (20%) — Historical Impact
Historical
40
25
Longevity
30
20
Leadership (15%) — Power & Stability
Tenure
50
40
Stability
30
30
Strategy (15%) — Tactics & Innovation
Strategy
50
20
Tactics
55
15
Reform
30
10
Similar Comparisons
Comments & Discussion
No comments yet. Be the first to share your thoughts!